Monday, December 29, 2014

Building Update #26 - Roofed, Insulated, and Waiting for Siding

This post is dedicated to my cousin Barry, who says he checks this blog twice a week and has only been let down for two months...

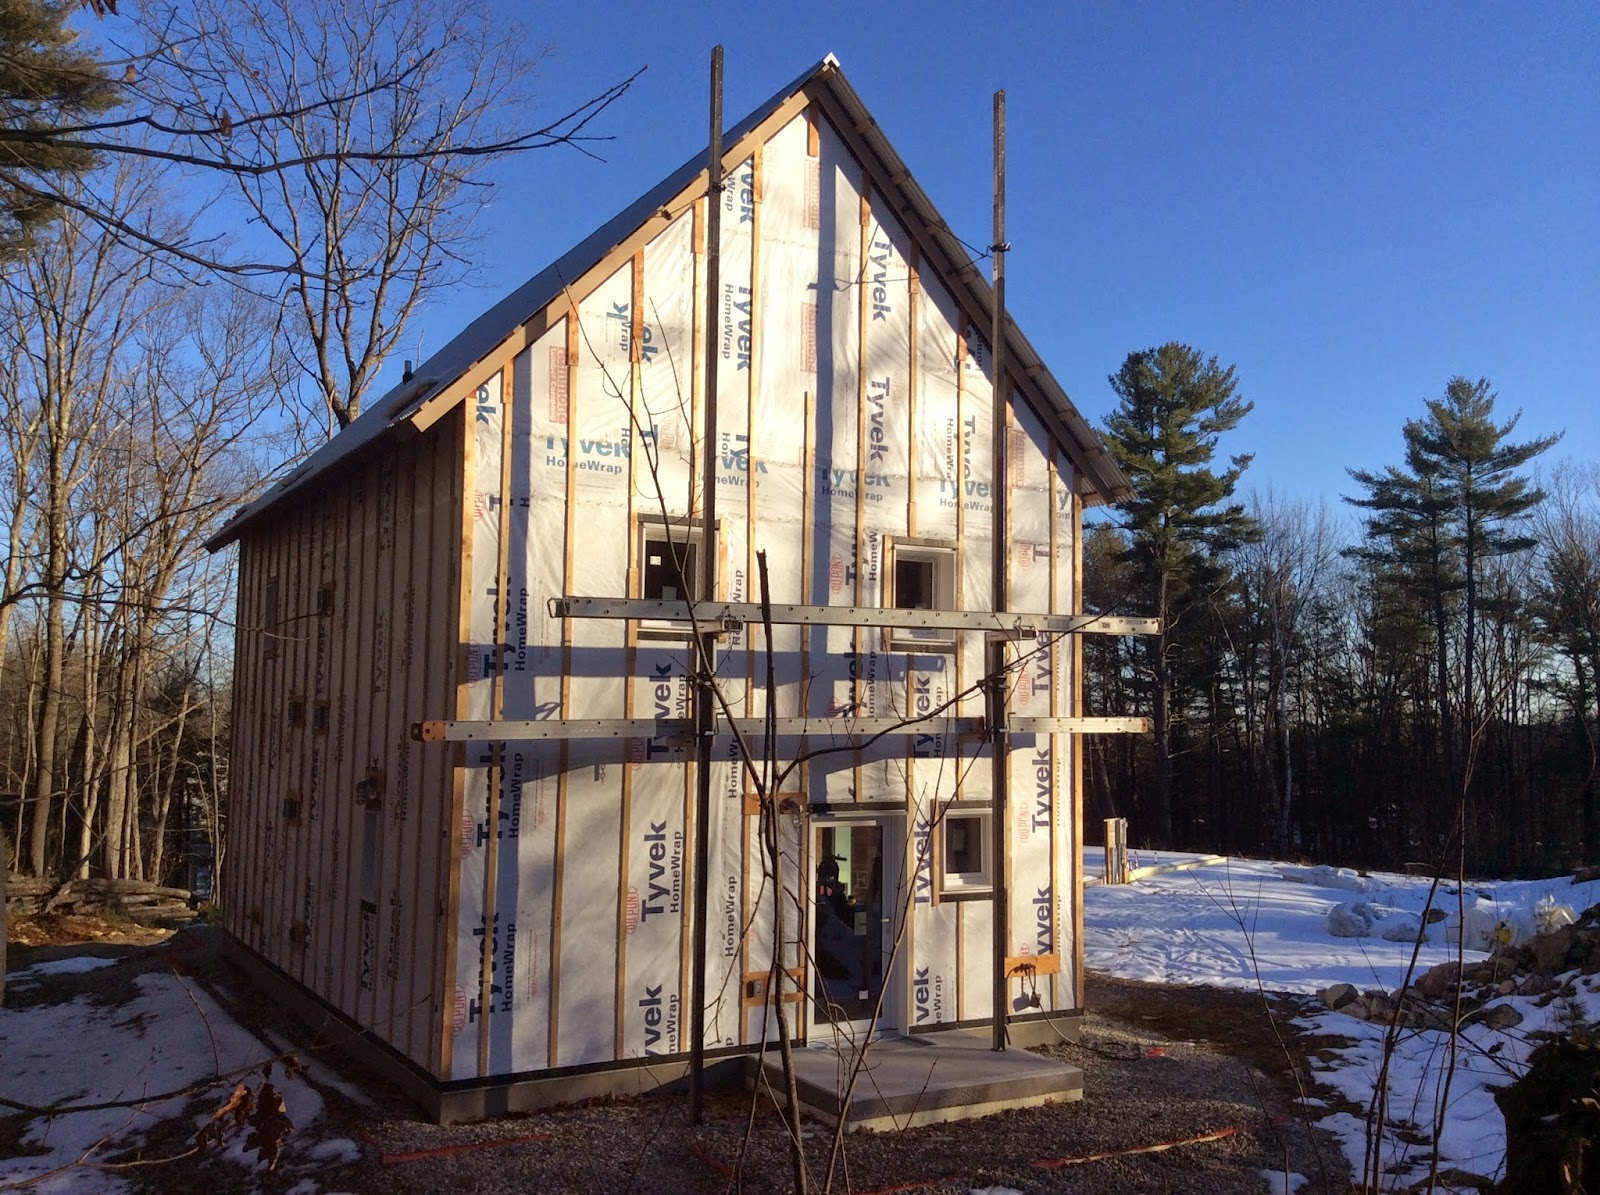
Since the last post in October Jake has done a lot of work.  The roof is finished and is successfully keeping the rain and snow out of and off of the house.  Jake replaced the three bedroom windows that were a couple inches too small for secondary egress, and has fully insulated, wrapped, and furred the house - finishing just hours before the Thanksgiving snow storm.  He has flashed and trimmed all the windows and doors, installed exterior electrical outlets and the doorbell, and brought power to the breaker box.  Jake has ordered the fiber-cement siding, which should be delivered any day now.  My Dad is hitting the gym to be able to assist (ladies take notice!).  

Although we haven't turned on the power inside, with three straight days of sun, I swear it was more comfortable in our half-finished house (still only have 6 inches of insulation in the attic - it will eventually be 30 inches) than in our garage apartment today!


The insulation going in.  Jake used offset 6-inch layers of mineral wool (spun rock).

The front door.  To the left, from top to bottom, exterior cage light, doorbell, electrical outlet.
The insulating, house wrap, and furring strips done.


This is our Zehnder heat recovery ventilator (HRV).  It exchanges stale house air with fresh outside air, heating the incoming air with the outgoing air through a flat-plate heat exchanger with an efficiency of 92%.  This means the air coming in will be almost the same temperature as the air leaving the house.  The house will be ventilated at a rate of 1/3 of an air change per hour - or in other words every three hours all the interior air will be exchanged with fresh air. 

The window trim viewed from the outside.  Jake has used foam insulation around the edges to decrease the heat losses where the window frame meets the rough opening (a classic location for heat loss).

Monday, October 20, 2014

Curiosity #5: Peligro Is My Middle Name

I'll begin this post by stating unequivocally that roofing at a 45 degree angle two stories up is physically as well as mentally challenging. Sure, a 12/12 pitch clad in 7/8" corrugated galvalume looks good. But after having completed a 12/12 metal roof I now know why I don't see a lot of them around. They are a tough nut to crack; impossible to walk on without some type of restraint or platform system, anything not anchored to the roof system slides off and in a hurry, and the idea of achieving something approaching physical comfort while on the roof is wishful thinking. Would I do a 12/12 metal roof again? It would take a lot more than good looks to convince me to sign up for the challenge. With luck I won't have to think about messing with the house roof for 50 years. 

Going into the roofing portion of the job I didn't have a lot of background information beyond what I could glean from the metal roofing installation guidelines. Stuff is included about substrate requirements, fastener spacing, fastener type, etc. But nothing on how to install the thousand or so screws or how to get the roofing to the roof to begin with.

Click here to check out a short video on installing very long metal sheets. It gave me some idea about the durability of metal sheets and how they could be moved about.

As far as moving around on the roof once the metal was put in place, I read a short anecdote on hosing the metal down with a sugary soft drink of choice to make things sticky. I decided the mess wasn't worth it and wore my running shoes instead for the softer soles and extra grip. Only once did I leave the laces loose enough for a shoe to fall off (believe me, a few choice words escaped my lips when that happened).

On to the job, the first order of business was to make myself a roof sheet handle so each sheet could be pulled up to the roof peak. Because the sheets were 18'+ long and weighed approximately 50lbs pushing them up to the peak was out of the question. I found out while moving plywood from the bottom that once the center of gravity gets tilted away from plumb bad things start to happen quickly. Losing control of an 18' metal razor twenty feet in the air just wasn't an option. So, the roof sheet handle was created and is displayed in figure 1 below.

Figure 1: Roof Sheet Handle
The roof sheet handle is as simple as it looks. It's a 2x2 stick as wide as the roof sheet with a door handle, a quick disconnect, and two #10 truss head screws with wood t-nuts to attach the handle to the metal sheet. Looks kind of flimsy but remember, the design load is a whopping 50lbs. The roof sheet handle showed little wear over twenty-eight successful hoists.

I also made three bracket/gage assemblies that would capture the bottom of the sheets to hold/align them before they were fastened with screws. The gages weren't precision devices but they got the job done. An example is show below in figure 2. 

Figure 2: Bracket/Gage Assembly
The vertical portion of the 3/4" plywood assembly prevents sheets from sliding off the roof. The wing nut and slot mechanism allowed the sheet to be set close to its final aligned position at the critical eave edge. On the right side of the assembly is a metal angle secured to a 2x6 block that was hooked onto the eave purlin. A quick clamp was used to secure the assembly by squeezing the 2x6 to the mock rafter tail. 

With the sheet side of the problem under control, it's time to address the problem of soft pink bodies falling from rooftops. OSHA has quite a bit to say about that particular topic in the form of fall prevention. 

For this job there were two primary requirements:
1. Not fall off the roof to avoid OSHA nastiness and close contact with the medical community,
2. Work hands free. 

Mountain climbers have the same two seemingly incompatible requirements. Mountain climbing gear might not be what OSHA had in mind but it's what I had on hand. Specifically, this project called for: 1. a Grigri (figure 3) 2. a climbing harness (figure 4) 3. a climbing rope (figure 5).

Figure 3: Grigri


Figure 4: Climbing Harness
Figure 5: Climbing Rope
For the uninitiated, the ends of the rope are attached to anchors on both sides of the peak of the house (tree, vehicle, side of the house, etc.), the Grigri is attached to the climbing harness, and the rope is passed through the Grigri. The great thing about the Grigri is that it allows the operator to adjust their position up and down the rope at will (it's a self belaying device). And when the operator needs to work they can work hands free. Sonia turned me on to this setup and without it the work I've done on the roof just would not have been possible. No. It's not an OSHA fall protection rig but what I was doing was working on a roof. Not trying to throw myself off of one. The Feds may not see a difference but I do.

With the gear side under control it was time to move some metal. Well, almost. Step 1: As many holes as possible for screws were drilled on the ground. Most metal roofing screws are billed as self drilling but forget about that nonsense. It's far better to make a big stack of sheets, mark hole positions, then fire up the drill with appropriate bit. The more work that can be done on the ground the better. And drilling the sheets in a stack will result in nearly perfect screw alignment once the metal is on the roof. 

Step 1A: Install roof bracket/gage assemblies where required. 

Step 2: Position sheets at the base of guidance ladder (see figure 6 below).

Figure 6: Sheet Positioned at Base of Guidance Ladder
Step 3: Load sheets onto guidance ladder (see figure 7 below).

Figure 7: Sheet Loaded Onto Guidance Ladder
Note: It required two people to load sheets onto the ladder. And even then, it wasn't all that pleasant at times keeping the bottom half of the sheet from kicking away while tilting the sheet vertically. But it was a quick way to get the job done. The taller the person or the shorter the sheet the better. Five sheets at a time were loaded onto the ladder for transport to the roof. Five sheets at a time were placed on the roof for installation.

Step 4: Attach handle to sheet and hoist sheet up and onto the roof deck (see figures 8 and 9 below). One man lifts the sheet up the ladder while the other is near the peak pulling the sheet up the ladder. 

Figure 8: Mr. Barrantes Lifting Sheet up Ladder
Figure 9: Glutton for Pain Pulling Sheet up Roof
Initially a pulley assembly hooked over the ridge was used to pull the sheets up the roof. In the end, it was better to take position on the other side of the ridge and pull the sheet straight up the roof. Again, the load is only 50lbs which was quite manageable. 

Once five sheets were stacked on the roof they were placed and screwed into position one by one. The only tricky part was the beginning and end of the installation. Because of the gable reveal the first and last sheets are different from all the rest. At the start of the job the first sheet was loaded on last. And at the end of the job the last sheet was loaded on first. 

In the beginning the job went painfully slow. The first day we managed to install two of twenty-eight sheets. By the end we were able to install seven or eight sheets in a day. The learning curve was pretty steep but once a good method was found progress picked up significantly. Not bad for two guys with absolutely no roofing experience between us.  

Peligro is My Middle Name


Monday, September 8, 2014

Building Update #25: Some Plumbing, Some Electrical, and Some Roof

Since our last update, Jake has been working hard at the structural steel design for our door entries, my plumbing design, and we have both been working on the electrical design.  Pulling victory from the jaws of defeat, Jake was able to convert my not-quite-right plumbing plan that was designed for use with all AAVs (air admittance valves) to a conventionally vented system.


We are working on the final lighting and electrical layouts, but in the meantime Jake, his Dad, and my Dad put together some sweet airtight electrical outlet boxes for the exterior lights and exterior outlets. 


Our roofing and fasteners finally came in, so with the help of friends and family, Jake has been finishing our roof one 18 foot by 3 foot corrugated panel at a time. 

The roofing panels ready to go up.

The panels will get pulled up the ladder, and then pulled up to the roof.

My Dad and Jake set the custom jigs they built to hold the roof panels in place while they are being screwed down. 

Jake setting up the pulley system on the ridge.

My Dad helping the panel up onto the roof after we transition it from the ladder to the ridge pulley.

Getting it into place. 

Wednesday, June 4, 2014

Curiosity #4: House vs. Blower Door Test

Today was the day the house squared up to the blower door, looked it in the eye, then ran it over Mack truck style.

Before getting to the gritty details, I'll say if you're hoping to read about how the blower door test was conducted with a repurposed squirrel cage blower from Harbor Freight and a manometer improvised with old test tubes and a length of surgical tubing this post will be a disappointment. It's not that it couldn't be done rather it didn't have to be done. For this test a professional with actual equipment was brought to bare.

Last week Chris of ReVision Heat dropped by to run what would be the first of two calibrated blower door tests (see figure 1 below). Two?! As it turned out the blower door setup Chris had on hand for the first test couldn't achieve flow rates low enough to get an accurate assessment of the amount of air the house was leaking once depressurized to 50 pascals. We did manage to get a reading with the house depressurized to three times the required amount (150 pascals). The reading was approximately 90 cubic feet per minute (cfm). Incidentally, our test limit for international Passivhaus certification is approximately 90 cfm. This was a good sign.

Figure 1: Chris of ReVision Heat Running Blower Door Test #1
As an aside, depressurizing the house to 150 pascals was an interesting event in and of itself. We could hear the outside atmosphere crunching the house down onto the foundation. In addition, the blower door was severely bowed into the building. Chris had to actively hold the blower test rig into the door opening to keep it from being blown into the house. Really wild to to experience something like that apart from machines like airplanes or submarines that operate with significant differences in pressure between interior and exterior environments.

Today Chris returned with a few new test rig additions to give the house its second blower door test. We knew the house would perform well but didn't know how well until the test rig was installed and fired up. The results of the second blower door test are included below in figure 2.

Figure 2: Second Blower Door Test Results
 The number on the left in figure 2 shows the pressure differential between the inside and outside of the building. Negative 50 pascals means there's more pressure outside than inside the house. The number on the right (47 cfm) is the rate at which air is moving through the blower door to produce a negative 50 pascal pressure differential. The maximum allowable is 91 cfm for our house. Right now the house is leaking air at about 0.3 Air Changes per Hour (ACH) or half the 0.6 ACH at 50 pascals allowed by the Passivhaus building standard.

OK. So, how big a deal is 0.3 ACH at 50 pascals? Here in the US the most stringent commonly enforced residential air infiltration requirement comes from the 2012 International Energy Conservation Code (2012 IECC). If we were building a house to meet 2012 IECC requirements we'd need less than or equal to 3 ACH at 50 pascals. Our house could leak ten times the amount of air it does now (910 cfm!) and meet the 2012 IECC limit. That's right. Ten times. In the US we'd be legal. In Germany we'd probably be thrown in jail.

Prior to 2012 a US residence could be built and never subjected to a blower door test. Think about that the next time you're plunking down a big greasy wad of cash to cover the heating bill in the dead of winter. Big wad means big air leaks.  


Saturday, May 24, 2014

Curiosity #3: Man vs. Triple Pane (Harbor Freight Part Two)

 The triple pane Schueco window and door units were delivered to the site a few Saturdays ago. The delivery crew consisted of two Tennessee bedouins. Sonia and I augmented the delivery crew. Good thing it was saturday so Sonia could help. The main picture windows and doors weighed in at better than 250lbs per unit. Triple panes deliver exceptional thermal performance (best Center Of Glass R-value is approximately 10 for our units) but not without significant weight.

Normally the delivery crew installs the windows. The rough openings weren't ready for immediate installation so my help quickly receded over the horizon. No harm no foul. I needed to examine the windows and doors to tailor the rough opening sill to suit.

Tailoring of the rough openings bought me time to think about just how in the hell I was going to move 250lb windows and doors into position. Installing the 2'x3' and 3'x3' units gave me some insight into what it would take to properly move and position the more intimidating units.

What the large units would take was more force and control than I could generate relying on pure muscle power alone; a situation I've encountered before during solo installations of Chevy V-8 power trains. When the going gets tough the tough chop big unsolvable problems into solvable chunks.

First up, how to hold onto a massive piece of plate glass. What I needed was Powr-Grip performance at Pabst Blue Ribbon (PBR) prices. There is only one place to turn at times like these: Harbor Freight. Four Dual Cup Suction Lifters with 125lbs of pull per seemed like they'd do the trick. And they did. Check out the airborne window below in figure 1.

Figure 1: Four Harbor Freight Dual Suction Cup Lifters vs. 250lb Window
The 2000lb worm drive winch and 450lb pulleys of absolutely horrendous quality were again pressed into service. The framing I attached my lifting rig to had no problem during my monkey swinging load tests so I was fairly confident it wouldn't give up the ghost come game time.

Now, how to shift the massive window from point A to B. The Egyptians may not have had mover's dollies at their disposal but I did. Included below in figure 2 is a picture of one of the picture windows on wheels.
Figure 2: Picture Window on Wheels
I was a bit concerned about the dollies kicking out from under the center of gravity of the window leaving me with a pile of shards. Slow steady movement and positive control of the top half of the window prevented disaster.

Once the window was below its opening the lift rig was shifted over to the required location. After applying an appropriate number of fasteners to the rig blocks, the window was hooked up and lifted into the opening. Figures 3 through 5 below show the hoisting process.

Figure 3: Window Tied to Framing Awaiting Lift Rig
Figure 4: Lift Rig In Place and Hoisting Window
Figure 5: Window Hoisted Into Position
First floor complete and in the bank. But what about the second floor? A much more intimidating proposition. Instead of hoisting the windows a foot or two they had to be moved at least nine feet vertically and then into position.

Genie makes material lifts that are commonly available at industrial rental places like United and Sunbelt. The trouble is the lifts typically available are the largest size Genie makes. That would amount to moving a 370lb device into my truck and then from my truck into the house. My motorcycle weighs about the same without fluids and moving that thing around is no walk in the park.

No problem. Just hook my lifting rig to the roof truss bottom chords, apply electrical power, and squeeze the trigger...or not. My Milwaukee 1/2" hammer drill moved the window about four feet vertically before smoke started pouring from the cooling/ventilation ports. I had encountered the same result before while hoisting the roof trusses but kept on going. However, the prospect of destroying a $1500 window that would take months to replace gave me pause. Time to upgrade. 

Never one to throw the baby out with the bath water the Milwaukee 1/2" hammer drill was removed and replaced with an el-cheapo 1/2" Heavy Duty Low Speed Drill from...Harbor Freight. That one upgrade made all the difference and is highly recommended for those cobbling together lifting rigs. Figures 6 through 9 show the hoisting sequence for the second story windows.

Figure 6: Window Starting to Make its Way to the Second Floor
Figure 7: Window at Second Floor
Figure 8: Window on Dollies
Figure 9: Window Ready For Installation
The two main doors were installed in much the same way as the windows. Man-1, Triple Pane Fenestration-0. Figure 10 smells like victory.

Figure 10: Windows and Doors Installed


Saturday, April 26, 2014

Building Update #24: Catching Up

My sincere apologies to all of our blog followers.  I have been MIA for a couple months, but I will bring you up to date tonight!  Jake has made a lot of progress since the end of February.  Our windows have cleared Customs, and Jake will be ready for them soon.  Once the windows are in we will do a preliminary blower door test to check the airtightness of the house while it is still relatively easy to seal leaks.  I'll let the pictures do the talking:
Where I last left you at the beginning of March.

Baxter making sure Jake gets the air-sealing right. 

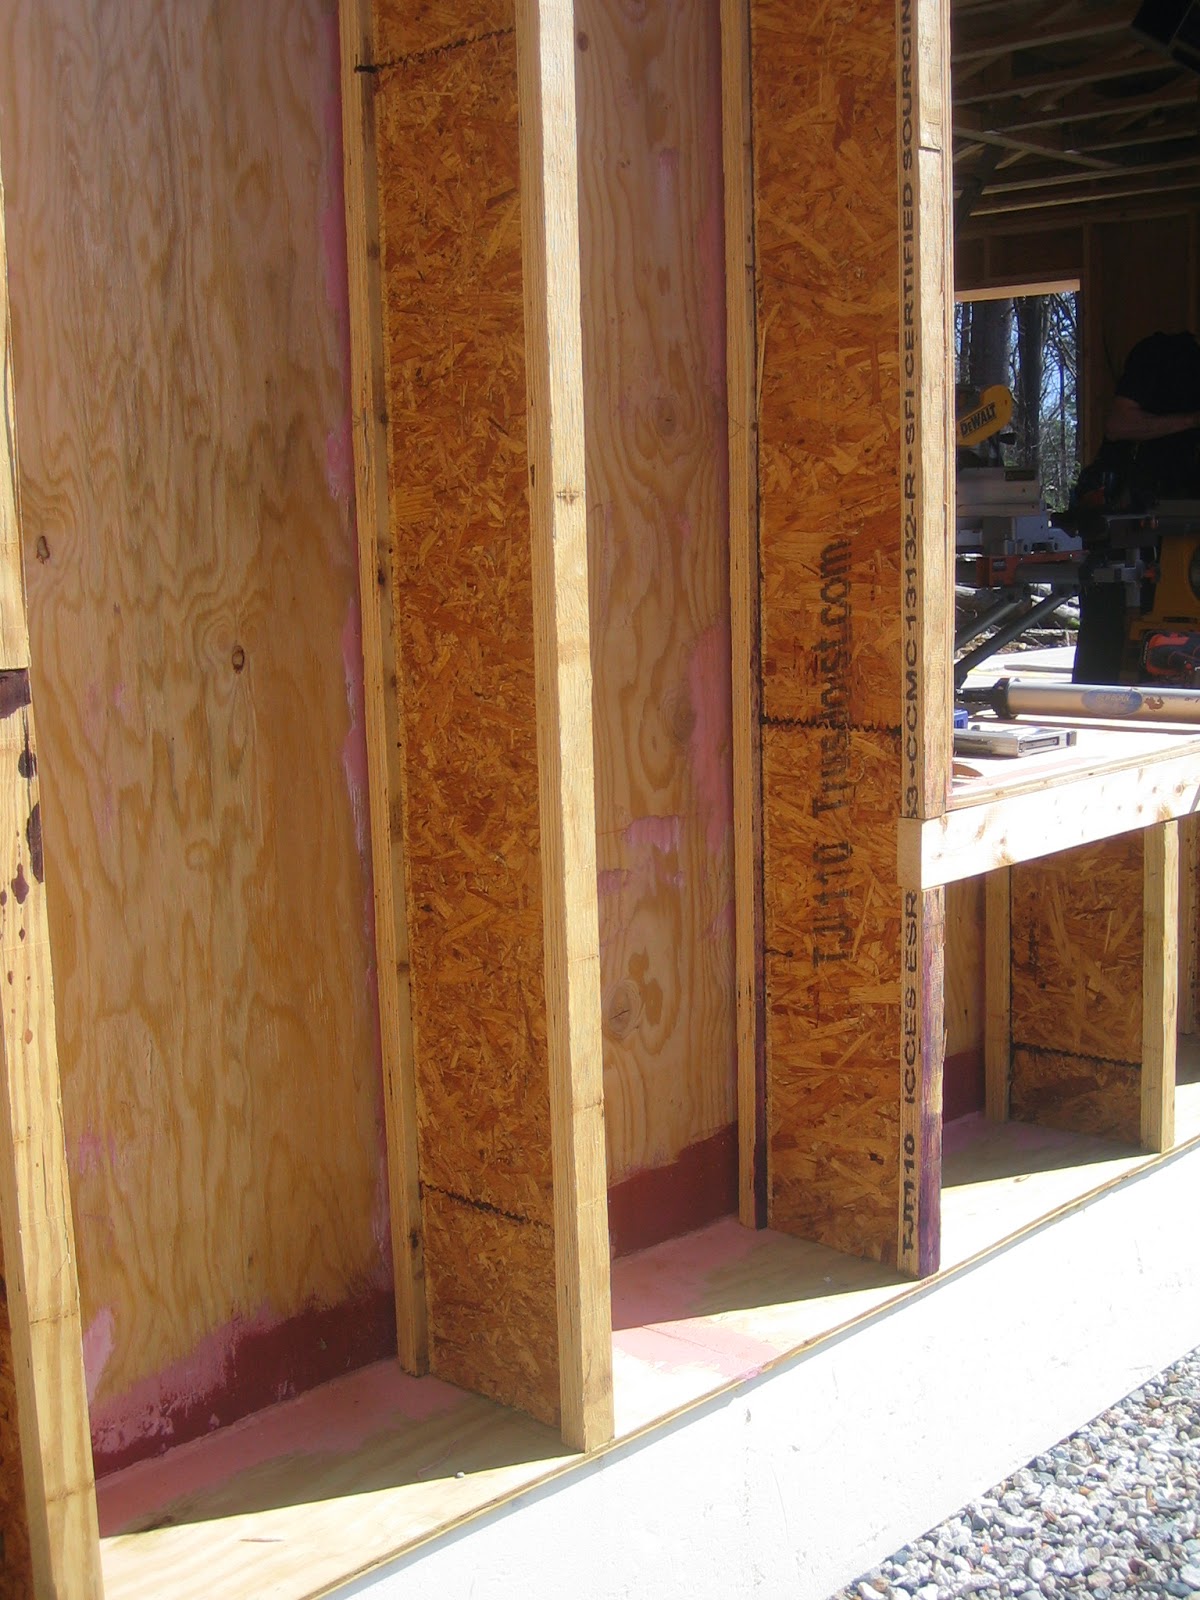
After a building strategy break, Jake has started attaching 11-7/8" TJIs (manufactured wood joists) vertically to the stud wall.  They will eventually hold our exterior layer of insulation and our siding. 

Before attaching the TJIs, Jake built window "boxes" to go in the rough openings of all of our windows, they are the full width of the wall. 


The TJIs are held about 1/2" off of the wall with shims, but are screwed into the studs. 

The second level of TJIs going up.


Jake put up all the TJIs, except the ones at the center of the gable ends from the top of a very tall ladder. 


A special visit from Germany - my best friend and her two adorable children.

Jake had to get some extensions for his scaffolding, but once he did he was able to finish the second level of TJIs on the east gable end (so far).


Jake used his sweet homemade hot-wire foam cutter to cut foam in preparation for the windows.